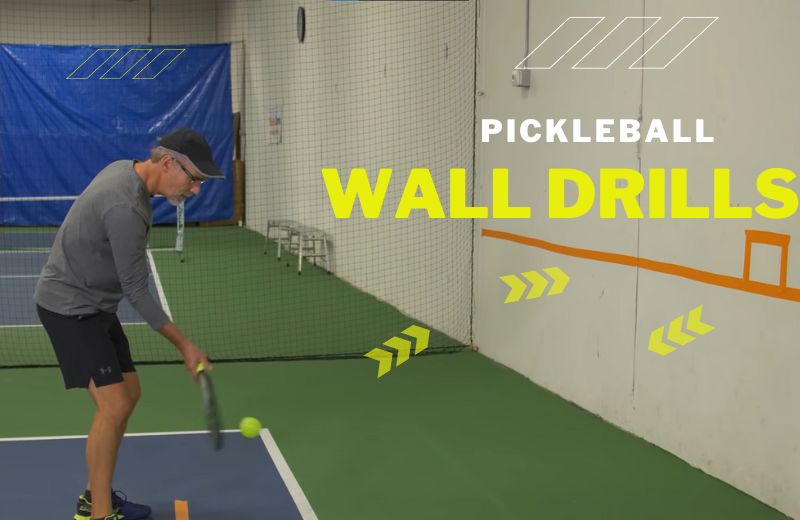
Setting Up the Pickleball Wall Drills
Yes, you must set up a proper wall to practice correctly. Let’s go through all of these steps one by one;
Location
Since a wall is necessary for making this setup, indoor locations are ideal. You can check your local pickleball indoor courts to check whether they have practice walls or not.
Most states don’t have indoor courts and the subscription to indoor courts can also be costly for some. So it is advised to make this setup in your basement or the empty garage.
Wherever you make this setup, just keep these two things in mind;
- Dimensions of a Pickleball Court – 44 feet by 20 feet
- Height of a Pickleball Net – 36 inches
It is essential to keep the dimensions in mind because you must choose a wall that has a free area of a few feets. Similarly, the wall should be higher than the height of an actual pickleball net.
Also, don’t forget to make sure you have clear and open space if you’re playing indoors. Also, make sure that there are no extra things in the area of the court.
Required Items
The first and most important thing that you’ll need is the practice wall a.k.a Pickleball Rebounder. The way of finding the best one is already mentioned earlier.
So the other items that you’ll need are the basic pickleball equipment to practice. For instance, you must have a paddle as well as a proper pickleball ball.
Some people also like to use ping pong or table tennis balls. However, if you’re a beginner, you can stick to indoor pickleball. Therefore, ping pong balls are used by the pros who use these for challenging a drill.
Table tennis balls are light in weight and small in size so more focus and skill are required to use them as pickleball balls. You must also grab a roll of tape to take the markings on the wall.
The Main Step
Once you are done with deciding the location and have also gathered the items near the wall, it’s time to take a step further. Now we would be setting up the wall for drills.
Grab the tape and use it to mark the wall. Place this tape from the floor to 34-36 inches above the floor. This way, you have created a pickleball net without using an actual ‘net’.
From the top of this line, place the tape horizontally till you reach the recommended width of the pickleball court. This horizontal line will be representing the top of the net. Make another vertical line of 34-36 inches to the floor.
Since a pickleball game is incomplete without the kitchen and the border lines, use the tape to make the kitchen line as well as sidelines and baselines.
While putting these tape lines, just make sure that you are only creating one side of the court so make the dimensions accordingly.
Target Area
Although it’s not a rule, you must practice certain areas of the pickleball game to have a perfect play. Therefore, use the tape on the area where you want to practice.
For instance, most of the pickleball players can’t play in the no man’s land. But if you want to upgrade your game and want to practice in this area, place a tape to practice here.
You can also place tape on the wall to indicate the position of your pickleball opponent. This way, you’ll be able to practice the dinks and overhead shots.
Once you’re done, you can grab your pickleball equipment and start playing!
Pickleball Wall Drill
Now that you know how to set up the pickleball practice wall, let’s have a look at some of the drills you can do on your own to upscale your game.
Volley Drills
No doubt, volley shots seem easier than ground strokes, but they can be difficult when you are playing the game. Most picklers make the mistake of moving to the nonvolley zone for playing the volley strokes, which costs them a point.
Therefore, you must add this drill to your daily practice sessions to train your instincts and build better muscle memory. In short, pickleball volley wall drills will help you to improve your accuracy and reaction time. You can practice these wall drills by hitting the ball against the wall at different angles and speeds, and try to catch it before it bounces on the ground. This will help you to develop your hand-eye coordination and reflexes for pickleball volley shots.
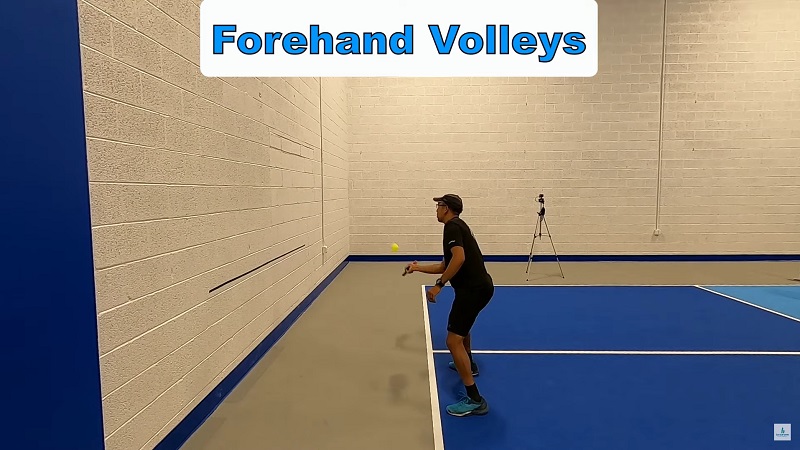
To do the proper volley drills, follow these steps;
- Place the tape on the wall to indicate the net (earlier we explained it in detail).
- Mark the non-volley line with a tape and stay away from this line for the volley drills.
- Use the paddle to hit the pickleball off the wall and try to catch it before it hits the ground.
This drill is extremely simple, but you can add some twists to make it more challenging. For starters, the forehand volley drill is a good one to start. Use the appropriate grip while practicing this.
Then you can move on to the backward volley drill. Lastly, players can practice switching between different grips. Although this drill is easy, doing this drill requires patience and dedication along with consistency.
Groundstroke Drill
This drill is probably the easiest one that you can do on your own. A groundstroke has to be hit after the ball has bounced off the ground.
Since the wall allows the ball to bounce easily, it becomes easier for beginner pickleball players to practice the groundstrokes. Also, there are no restrictions on the area to play this shot, so you can move freely.
But you must not merely hit the ball once it hits the ground, instead practice the forehand and backhand grips to do this.
Also, there are no restrictions on the area to play this shot, so you can move freely and work on perfecting your forehand and backhand pickleball grip while executing the groundstrokes.
Once you have mastered both the groundstroke and volley drill, you can start practicing like a real game. Try to switch between both strokes to have better practice.
Dink Drills
The pickleball dinking drill is a crucial drill for any player since Dinks are considered to be important but tricky shots but it gets difficult to practice without any partner. But the fact is that you can practice using the pickleball practice wall.
While setting the area for this practice, you can make a mark with the tape to indicate the dink area. Then start by throwing a ball at the practice wall, and when it bounces back, hit a dink shot.
Make sure that you’re standing in the correct position to do it. Keep on doing this with the correct body positioning until you feel confident.
- Read more: “15 Best Pickleball Drills For Beginners To Improve Your Skills”
Overhead Wall Drills
Overhead shots can be tricky for the starting players as it requires proper footwork and positioning of the body. So if you are bad at these shots, the overhead drills are for you.
For the first few practices, try to play the overhead shots with proper footwork and position of the wrist and core. Then start working on the position of the shoulder and body.
Also don’t forget to stand away from the non-volley zone as this is, basically a volley stroke.
What size is a pickleball practice wall?
What are 3 things you Cannot do in the game of pickleball?
- No volleying in "the kitchen."
- There must be one bounce per side.
- You must serve at the baseline. Additionally, serves cannot land in the non-volley zone.
Can you play off the wall in pickleball?
What is pickleball with walls?
Summary
To sum it up, pickleball wall drills are a great way to practice when you don’t have a partner. With a few pieces of tape and a wall, you can practice your volleys, groundstrokes, dinks, overhead shots, and many other pickleball tips to enhance your game.
With consistent sessions of drilling, you’ll notice a drastic improvement in your game. So set your practice wall and let’s get drilling!
Taking Your Game to the Next Level
Once you’ve mastered these pickleball wall drills, you might be ready to take your game to the next level. Consider attending a pickleball clinic. These clinics are often led by experienced players and coaches who can provide you with personalized feedback and advanced strategies.
They offer a variety of drills and exercises that can help you refine your skills and become a more competitive player. So, after you’ve honed your skills with wall drills, step up your game by enrolling in a clinic. Happy practicing!
Related Article:
Skinny Singles Pickleball Rules: Everything You Need To Know
8 Best Pickleball Drills For Two – 2 Person Effective Practice